Cold fermentation is an artisanal approach to making pizza dough that is as much about patience as it is about technique. At its core, this method involves the slow fermentation of pizza dough in a refrigerated setting, typically between 24 to 72 hours.
By doing so, the dough develops a complex flavor profile and a delightful texture that is not achievable through traditional, quicker methods.
Unlike a dough that quickly rises at warm temperatures, a cold-fermented dough takes advantage of a prolonged fermentation period where enzymes break down carbohydrates into simpler sugars, resulting in a better crust browning and an enhanced overall taste.

The process pays homage to the craft of baking, allowing the yeast to work its magic slowly and offering a manageable timeline for home bakers and professionals alike.
It demands minimal hands-on time but requires forethought and planning.
The technique varies from letting dough rest in a cool room to placing it in a refrigerator for several days, ensuring that the yeast fermentation is gradual and consistent, which ultimately contributes to the final dough’s structure and flavor.
This approach also offers increased flexibility in the pizza-making process, as the extended fermentation period allows bakers to prepare dough well in advance of baking.
Key Takeaways
- Cold fermentation enhances flavor and texture over a period of 24 to 72 hours.
- The technique involves minimal active time but requires planning.
- Flexibility is offered in the baking process through advance preparation.
Fundamentals of Cold Fermentation Pizza Dough

Cold fermentation is a crucial process to enhance the quality of pizza dough, giving me flavors that are intricately complex and a texture that is hard to achieve with quick rise methods. This technique relies on controlling temperature and time to develop the dough.
Complexity of Flavors and Texture
In my dough making, I’ve observed that cold fermentation allows the yeast to work slowly, breaking down carbohydrates into flavorful organic acids and gas. This not only contributes to a more nuanced taste profile, but also to a desirable texture.
The slow fermentation in the refrigerator, which ideally takes place between 24 and 72 hours, allows the gluten network to develop at a gradual pace, enhancing the final chew and crumb of my crust.
Gluten Structure and Fermentation Process
During my cold fermentation process, gluten—the protein matrix in flour that gives dough its elasticity and chew—becomes stronger and more complex.
My typical recipe starts with a proper mixture of water, flour, yeast, and salt.
By adjusting these components and the fermentation time, I influence the texture and flavor of the dough.
A lower fermentation temperature, like the optimal 59°F (15°C), slows yeast activity but does not halt it, allowing a gradual formation of gluten structure without overproofing. This approach results in a dough that’s easier to shape and imparts superior texture and flavor.
Creating the Perfect Cold Fermented Dough

In crafting the perfect cold fermented pizza dough, I prioritize the selection of quality ingredients, precise mixing and kneading techniques, and appropriate fermentation timelines. The approach enhances the texture and flavor of the final crust.
Choosing Your Ingredients
To begin with, the flour is paramount. I recommend a strong flour with high protein content, typically labeled as “bread flour.” This fosters gluten development, contributing to a chewy and airy crust.
Constant hydration is crucial; for this dough, a hydration level of 60-65% strikes a balance between manageability and a tender crumb.
The water should be cool to slow down yeast activity. I always use sea salt for a clean, refined flavor, and fresh yeast for its reliability, though dry yeast is an acceptable alternative.
Key Ingredients Summary:
- Flour: Use strong (bread) flour for better gluten formation.
- Hydration: Aim for 60-65% water content by weight of flour.
- Salt: Prefer sea salt for taste.
- Yeast: Fresh yeast is preferred, though dry yeast can suffice.
Mixing and Kneading Techniques
When it comes to mixing, I combine flour, water, salt, and yeast, ensuring the yeast dissolves completely in water before adding it to the mix.
Kneading can be done using a stand mixer or by hand.
With a mixer, I knead on a low setting for around 5 minutes until the dough is smooth and elastic. If kneading by hand, I extend the process to about 10 minutes. Adding olive oil after the initial mix can help create a supple dough.
Kneading Overview:
- Mixer Kneading: Low setting for 5 minutes until elastic.
- Hand Kneading: Roughly 10 minutes, achieving a similar texture.
Cold Fermentation Time Frames
For the cold fermentation, I advocate a minimum of 24 hours and up to 72 hours in the refrigerator.
This slow fermentation allows flavors to develop and the dough to gain complexity.
As a general rule, longer fermentation equates to more flavor, but I find that beyond 72 hours, the gains diminish and the dough may overproof.
Fermentation Guide:
- Minimum Time: Not less than 24 hours.
- Optimum Window: 24 to 72 hours for a developed flavor profile.
- Refrigeration: Keep the dough between 38°F (3.3°C) and 40°F (4.4°C).
Shaping and Proofing Your Dough

When I shape and proof my cold fermented dough, I focus on creating uniform dough balls for consistent baking and flavor development. The final rise is crucial, as it allows the yeast to work its magic one last time before baking.
Dividing Dough Balls
I begin by gently turning the cold fermented dough out onto my lightly floured surface. Using a dough scraper, I divide the mixture into equal portions—I aim for dough balls that are roughly the same size to ensure they bake evenly. Here’s my process:
- Weigh each portion to maintain consistency. I typically aim for dough balls that are about 250 grams.
- Shape each portion into a tight ball. I do this by pulling the edges towards the center and then pinching them together, flipping the dough over, and using the surface tension to create a smooth ball.
- I rest the dough balls on a tray with enough space between them to avoid sticking together.
Final Rise and Proofing Methods
For the final rise, I follow these steps:
- Proof the dough balls at room temperature to allow for a proper second rise. The time varies, but it usually takes between 1 to 2 hours depending on the dough’s temperature and the ambient room conditions.
- I know the dough balls are ready when they have doubled in size and exhibit a slight dome shape.
- Rest is key—after shaping, I ensure that the dough balls are left undisturbed during this final proofing stage to prevent degassing, which can affect texture and rise.
During proofing, I keep a close eye on the dough.
If it proofs too quickly, I can slow it down by placing it in a cooler part of the room.
Conversely, if the dough is too cold or the room is chilly, I might find a slightly warmer spot to encourage the yeast activity.
I use a thermometer to keep the temperature guesswork out of the equation, aiming for around 75°F (24°C) for optimal rise without sacrificing dough structure.
Baking and Toppings

Prior to topping my pizza, I ensure that the crust has developed a nice texture and structure during cold fermentation. The baking process is crucial for achieving the perfect crust, while the selection of toppings contributes to the unique flavor profiles of my pizzas.
Understanding Baking Fundamentals
When I bake my cold-fermented pizza dough, I use a pizza stone or pizza steel, preheated in the oven for at least 45-60 minutes at the highest temperature setting, often with the broiler on.
These tools offer a blistering hot surface upon which the dough can cook quickly and evenly.
I ensure that the oven reaches a temperature of 475°F (245°C) or higher to mimic the conditions of a professional pizza oven.
A hot oven reduces the bake time, which is typically around 7-10 minutes, giving that delightful crisp and charred texture to the crust that’s characteristic of a quality pizza.
- Preheat your oven to 475°F (245°C) or higher.
- Place the pizza stone or steel in the oven during preheating.
- Bake the pizza for 7-10 minutes.
Selecting and Applying Toppings
I carefully select my toppings, taking into account the balance of flavors and the moisture content, which can affect the dough’s crispiness. I apply toppings sparingly to avoid a soggy crust.
My sauce, typically a seasoned tomato base, is spread thinly, and I use a blend of mozzarella and other cheeses—always grated fresh. My choice of toppings usually includes a combination of vegetables, meats, and possibly a finishing of fresh herbs applied after baking.
The order of the toppings matters:
- Sauce
- Cheese
- Meats and/or vegetables
- (Post-bake) Fresh herbs or a drizzle of olive oil
To prevent a soggy pizza, I ensure that especially wet toppings, like mozzarella, are well-drained, and any vegetables are pre-cooked if they release water (like mushrooms or spinach).
Advanced Cold Fermentation Techniques

In my advanced techniques for cold fermentation, I focus on precise control of the fermentation process. This involves adjusting temperature, time, and hydration for optimal flavor and texture.
Manipulating Temperature and Time
My method hinges on a delicate balance between temperature and fermentation time. Here’s a table that outlines different time spans for fermenting pizza dough in cold environments, demonstrating how I manipulate these aspects:
| Fermentation Time | Temperature | Notes |
|---|---|---|
| 24 Hours | Room Temperature | I begin with a short room temp rest before refrigerating. |
| 48 Hours | Refrigerator | Extended refrigeration for a moderate flavor development. |
| 3-5 Days | Near Freezing | Pushing the limits to intensify flavor and improve texture. |
Note: Although 72-hour fermentation is common, I sometimes extend to 5 days for a complexity in flavor that is unmatched.
By changing these variables, I can impact the dough’s flavor profile and textural characteristics.
For a more nuanced taste, I opt for a long fermentation time of up to 3-5 days in the lower temperatures of a refrigerator.
Exploring Different Flours and Hydration Levels
I experiment with different types of flour and hydration levels:
-
Bread Flour: My preference is high-protein bread flour for its strength and ability to absorb more water. This leads to a chewy, crispy crust after a long cold ferment.
-
All-Purpose Flour: Sometimes I blend all-purpose flour with bread flour to manipulate the dough’s extensibility.
I adjust hydration levels, detailed below, to modify the dough’s characteristics:
- High Hydration (65-75%): For an airier crumb and lighter crust, I push hydration levels higher.
- Lower Hydration (58-65%): For a denser, crisper crust, I keep hydration at moderate levels.
The key is to understand the interplay between these elements. With the right flour and hydration, coupled with precise temperature control and fermentation time, I achieve my desired dough quality.
Storing and Using Leftover Dough
When I handle leftover pizza dough, my main considerations are maintaining its quality and extending its usability. Here’s how I go about refrigeration, freezing, and repurposing the dough.
Refrigeration and Freezing Methods
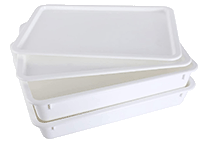
Refrigeration: For short-term storage, I place the cold fermented dough in a container and refrigerate it. The ideal container should be slightly oiled with olive oil to prevent sticking. I ensure that the container is airtight to keep the dough fresh. I find that the dough keeps well in the fridge for up to 48 hours.
-
Short-term Storage Table:
Container Prep Fridge Temp Storage Duration Lightly oiled 4°C (39°F) Up to 48 hours
Freezing: If I don’t plan to use the dough within the next couple of days, freezing is a viable option. I tightly wrap the portioned dough balls in plastic wrap and then again in a layer of foil to prevent freezer burn. I label each package with the date and can store them for up to 3 months. When I’m ready to use the dough, I thaw it in the refrigerator for 24 hours before letting it come to room temperature.
Freezing Steps:
- Portion dough and wrap in plastic.
- Encase in foil.
- Label with date.
- Freeze for up to 3 months.
- Thaw in the refrigerator before use.
Reusing Dough for Other Recipes
I often find myself with more cold fermented dough than needed for homemade pizza. In such cases, I repurpose the dough for various recipes. Calzones, garlic knots, and even homemade breadsticks are excellent choices.
The key is to bring the dough to room temperature so it’s workable. After that, I shape and bake according to the alternative recipe’s instructions.
- Alternative Uses:
- Calzones: Fill with cheese and toppings, fold, seal edges, and bake.
- Garlic Knots: Cut dough, tie in knots, bake, then coat in garlic butter.
- Breadsticks: Roll out dough, cut into strips, twist, and bake until golden.
Frequently Asked Questions
I’ve gathered the most common inquiries regarding the cold fermentation of pizza dough and provided clear, concise answers to enhance your pizza-making process.
What are the advantages of cold fermenting pizza dough compared to room temperature fermentation?
Cold fermenting pizza dough in the refrigerator extends the fermentation process, enhancing the dough’s flavor complexity and creating a superior texture. It allows for a more controlled rise, reducing the risk of overproofing.
How does cold fermentation affect the texture and flavor of pizza dough?
By fermenting the dough in a cold environment, the yeast works slower, resulting in a finer, more uniform crumb and a well-developed tangy flavor profile that can’t be achieved with quick, room-temperature rises.
Can pizza dough over-ferment in the refrigerator, and how can you tell?
Yes, pizza dough can over-ferment even in the refrigerator. Indicators of over-fermentation include a dough that is overly sticky, has a strong alcohol smell, or collapses when poked instead of slowly bouncing back.
What is the recommended time range for cold fermenting pizza dough to achieve optimal results?
The ideal cold fermentation time for pizza dough ranges from 24 to 72 hours. This timeframe allows the enzymes to act on the flour, improving the dough’s flavor and texture while maintaining its structural integrity.
Are there any special considerations when using a cold fermentation process for high-hydration doughs?
High-hydration doughs, which are stickier and more challenging to handle, benefit from cold fermentation as it firms up the dough, making it easier to shape. However, they may require a bit more time to fully develop flavors compared to lower hydration counterparts.
How does the duration of cold fermentation impact the development of gluten structure in pizza dough?
Longer cold fermentation periods give enzymes more time to work on the proteins in the flour. This results in a stronger, more elastic gluten network, contributing to a chewy yet tender crust upon baking.


